TiCS Client Installation
The TiCS client is an optional analyzer component of the TiCS framework that developers can use to check the quality of their code before committing (or pushing) it to the repository.
In order to start using TiCS client, you need to install the thin application wrapper on your machine. On each invocation, the wrapper queries the TiCS Viewer to determine which particular version of TiCS and which particular version of the wrapper (self updating) should be used. These versions will be downloaded to the local machine when not yet present. This means that the wrapper should normally not be updated if you want to start using a new version of TICS. However, in exceptional cases it might be needed to update the wrapper, because of changes or bug fixes that prevent the wrapper from updating itself.
Installation options
There are different ways to install the TiCS Client:
- Via the User Settings
- Using the TiCS Client installer
- Using the IDE plugins
Authentication
All installation options depend on the TiCS Viewer. Access to the TiCS viewer might require authentication. Therefore it is needed to obtain an authentication token on beforehand. Please take the following steps to obtain a personal token:
- Navigate to the TiCS Viewer and log in
- Go to the User Settings page, accessible from the menu bar on the left.

- Choose Authentication Tokens and click on Add Authentication Token
- Optionally add a description and/or expiration date
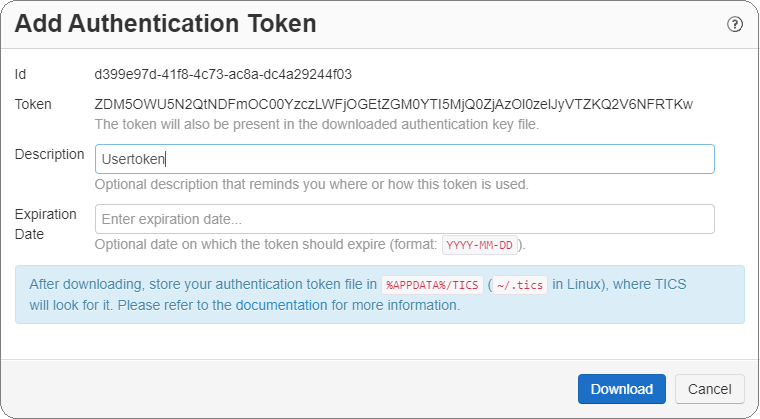
- Click on Download to download a file named
tics_client.token - Place the downloaded file in
%APPDATA%\TICS(Windows) or in~/.tics(Linux)
Installation via User Settings
- Navigate to the TiCS Viewer and log in
- Go to the User Settings page, accessible from the menu bar on the left.
- Choose Install TICS

- Select the applicable Configuration and Platform
If you don't know what configuration to use, click (help me) behind the Configuration drop down menu and enter your project's name to detect which configuration to use
- Click on Copy to clipboard
- Open a Powershell terminal and paste the copied command
- Press Enter to invoke the script and have TiCS installed
The TICS environment variable also contains the name of a
TiCS Analyzer Configuration.
If the location of the TiCS Viewer changes or you want to use a different configuration,
you should change the value of the TICS environment variable.
Installation using TiCS Client installer
Please take the following steps to install the TiCS client (wrapper) on your development machine:
-
Obtain (the location) of the TiCS client setup program (and optionally an accompanying
.inifile) from your system administrator or other TiCS representative. - The TiCS client (wrapper) and plugins are installed for the current user (admin privileges are not required)
-
Run the TiCS client setup program
The client installer has the following name:
ticssetup-client-<version>.exe
- If you are not running with an
.inifile, you have to provide:-
The destination folder where the TiCS client wrapper should be installed (default
%APPDATA%\TICS\Wrapper) -
The location of the TiCS Analyzer Configuration, which is a URL provided to you by your TiCS representative.
When the
TICSenvironment variable is already set, then the TiCS Analyzer Configuration field is pre-filed with it
-
The destination folder where the TiCS client wrapper should be installed (default
- In case any options are set in a setup.ini file, such as the URL to the TiCS Analyzer Configuration on the TiCS Viewer, the installer will not ask for those options
- The installer allows you to optionally install TiCS plugins for your IDE(s), which is described in more detal below
- During the installation, the TiCS installer will set the TICS environment variable for you, which is an URL pointing at an API endpoint of the TiCS Viewer to which it will connect. If it cannot authenticate, you need to obtain a personal token from the viewer to be able to connect
.ini file being present
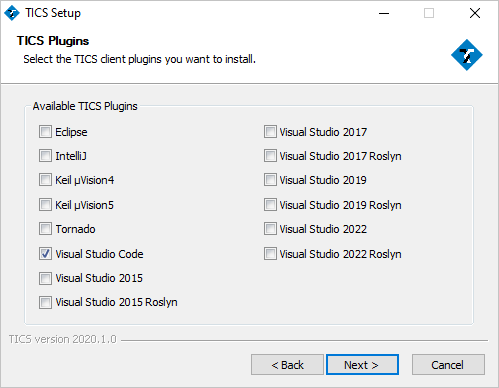
Plugin installation using TiCS Client installer
The installer allows you to optionally install TiCS plugins for your IDE(s), for example for Eclipse, Visual Studio, or IntelliJ. These will be automatically selected for installation when they can be found on your machine, but the installer allows you to deselect them if needed
- Close all IDE's for which you want to install a TiCS plugin
-
When getting to the TICS Plugins dialog, select the plugins you want to install
In this example Visual Studio Code
-
For some IDE's it is required to provide the IDE installation directory.
Provide this directory if the TiCS client installer asks for it. For instance, Eclipse and Visual Studio Code are known to require this
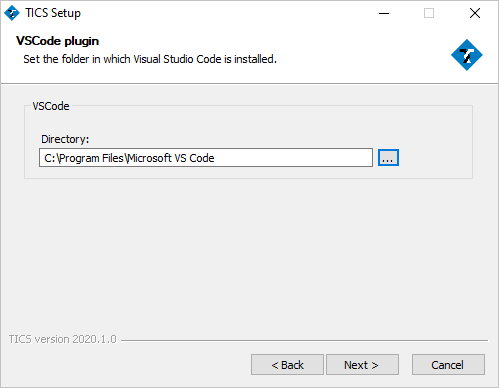
- Complete the installation
- Start your IDE
Troubleshooting
When executing TICS, I get an error referring to "PKIX path"
These PKIX path errors come in various forms, such as
PKIX path building failed: sun.security.provider.certpath.SunCertPathBuilderException:
unable to find valid certification path to requested target
or
PKIX path validation failed: java.security.cert.CertPathValidatorException: signature check failed.
This happens when the TiCS Viewer is using an SSL certificate that is either self-signed or uses a root certificate that is not recognized by the default trust store. To resolve this please see here.
Advanced
Manipulating client-side cache
The TiCS framework downloads TiCS binaries, code checkers, configuration files to a local cache directory before using them.
It may sometimes be desirable to show or remove the local cache.
This can be done by invoking the wrapper with the -wrapper flag.
In the examples below, we use the TICS command, but any TiCS
application (TICSQServer, TICSMaintenance, etc.) can
be used to accomplish the same thing.
Showing local caches
The command TICS -wrapper -showcache can be used to show the cache
that is available on the client. The output looks as follows:
DIRECTORY                                    CONTENTS      PART OF CONFIGURATION
f7c07954062d90832043efe806884775             lib           yes
346be58b99602d0005fdb522ad758dc6             bin           yes
0daa2869d4fa142520f7ea99f1b865ae             cfg           yes
9c766c48a0264cb6e5e9353135d6382c             rules         yes
1cc655ffc7de021b3a20d677dbf21cd9             chk           yes
The last column indicates whether the directory is part of the current configuration. If TiCS has been used for multiple configurations, this may result in directories that are not part of the current configuration.
Removing caches
In order to remove the local cache, the following commands can be used:
-
TICS -wrapper -clearconfigurationcache, which deletes the cache for the currently active configuration -
TICS -wrapper -clearallcaches, which deletes the caches for all configurations
The difference between caches that are part of the configuration and caches
that aren't can be seen through the command TICS -wrapper
-showcache.
Configuring connection retry behavior
If the wrapper fails to query the viewer, it will retry the connection a limited number of times. The connection timeout before a request is aborted, number of connection retries, and the delay between consecutive connection attempts can be configured by providing properties in thewrapper.properties file or by setting environment variables:
| Setting | Environment variable | Property | Default value |
|---|---|---|---|
| Number of connection retries | TICSCONNECTIONRETRIES | connection_retries | 10 |
| Delay between connection attempts (in seconds) | TICSCONNECTIONRETRYDELAY | connection_retry_delay | 60 |
| Connection timeout (in seconds) | TICSCONNECTIONTIMEOUT | connection_timeout | 300 |