Eclipse Plugin
This section describes the TICS Eclipse Plugin. This plugin can be used in Eclipse 4.6+ and versions of Wind River Workbench based on Eclipse 4.6+.
Installation
There are two ways to install the Eclipse plugin: manually or through the TICS Installer.TICS Installer
Under Windows, the easiest way to install the TICS Plugin is to use the TICS installer.
Close Eclipse and run the TiCS client installer.
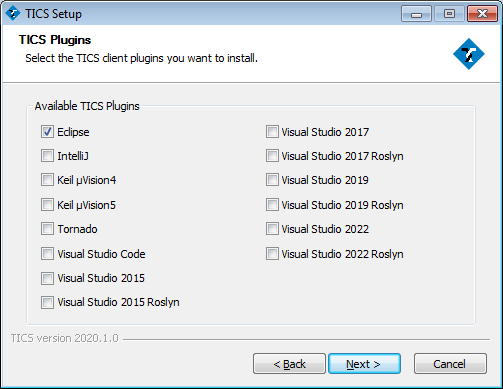
When getting to the TICS Add-ins dialog, select Eclipse.
The TICS Add-insstep in the TiCS client installer.
Complete the installation, providing the Eclipse installation folder if the TiCS client installer asks for it.
If the Eclipse plugin does not appear to be working after installation, make sure Eclipse is running with the required permissions to modify its own installation. Running Eclipse as Administrator ensures the plugin will be loaded correctly.
Manual Installation
Add the TICS Plugin to Eclipse without installer.
You need to have one of these files ready:
- com.tiobe.plugins.eclipse.ticsplugin_2019.3.1.37477.jar
- com.tiobe.plugins.eclipse.cdt.ticscdtplugin_2019.3.1.37477.jar
Here, the version number (2019.3.1.37477) may differ. The latter plugin is for CDT (C/C++) development in Eclipse. The former plugin is for Java (JDT) development. You can install both without any trouble.
Follow the steps to add this plugin to your Eclipse environment.
-
Find the directory that holds eclipse.exe (e.g.,
D:\eclipse\eclipse.exe).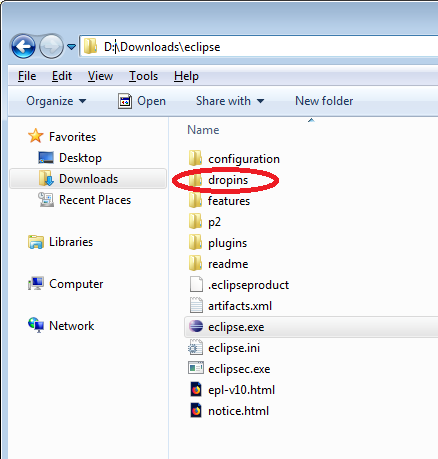
The Eclipse installation directory. -
Go to the dropins directory (e,g.,
D:\Downloads\eclipse\dropins). -
Copy the plugin(s) (the
.jarfiles from above) into this directory.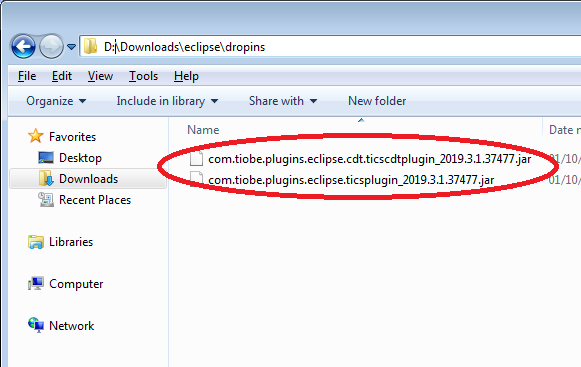
The Eclipse plugins directory. -
Restart Eclipse:
eclipse -clean. Use-cleanto force a clean start. The TICS icons will be visible in the toolbar.
Usage
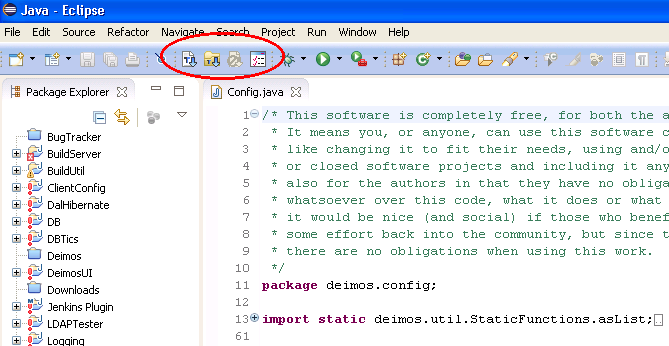
The TICS Eclipse Plugin provides a toolbar with four buttons.
The TICS buttons have the following meaning.
The Eclipse workspace with the TICS buttons.
-
 Analyze the active
File: clicking this button starts the TICS analysis. It
results in an overview of the violations of the available coding
standards.
-
 Analyze all files
in project: clicking this button starts analyzing all files in
the current vcxproj project file. It results in a consolidated overview
for all files in the project.
-
 Cancel analysis:
clicking this button cancels the TICS run.
-
 Rules and Options
configuration: clicking this button opens the TICS Configuration Tool.
This tool can be used to configure the behaviour of the TICS Client.
TICS Pane
The TICS Eclipse Plugin also provides a new pane in which the violations can be viewed, sorted, and filtered.
Opening the TICS Pane
The TICS Pane should automatically open after an analysis has been run from Eclipse. It can also be opened manually by following these steps:
- Open the
Windowmenu and navigate toShow ViewandOther ....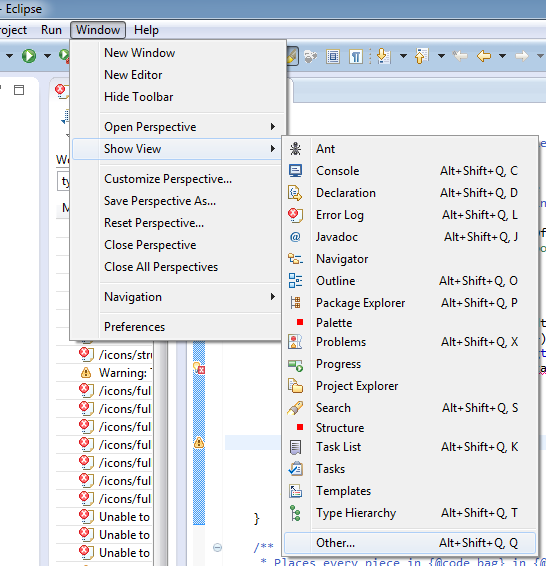
Opening the Show Viewdialog. - In the dialog that is opened, select
TICSunderTIOBEand click the OK button.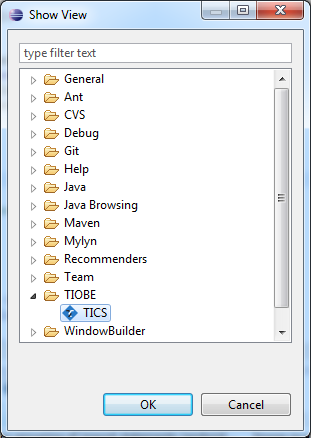
The Show Viewdialog.
Using the TICS Pane
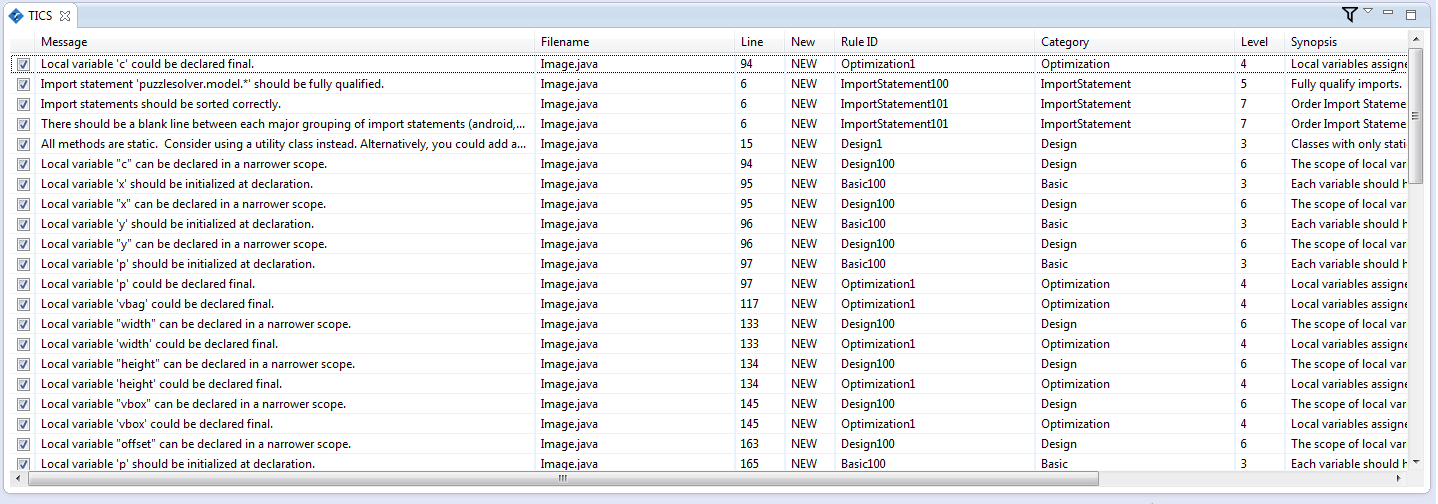
The TICS Pane is shown in the image below.
The TICS pane.
Some of the functionality offered by the TICS Pane includes:
- Hiding markers; this can be done by unchecking the checkboxes in front of violations.
- Sorting; this can be done by clicking column headers.
- Showing new violations only; this can be done through a checkbox in the
Viewmenu.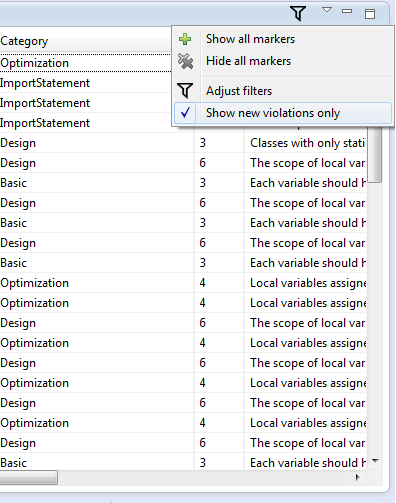
Showing new violations only. -
Filtering violations; this can be done through the
Adjust filtersdialog. This dialog can be opened by clicking the button in the top-right corner of the TICS Pane (see below).
The icon for this button can either be filled (shown above) or open. An open filter means no filter are currently applied. A filled filter means the results are filtered.
The button that opens the Adjust filtersdialog.
From the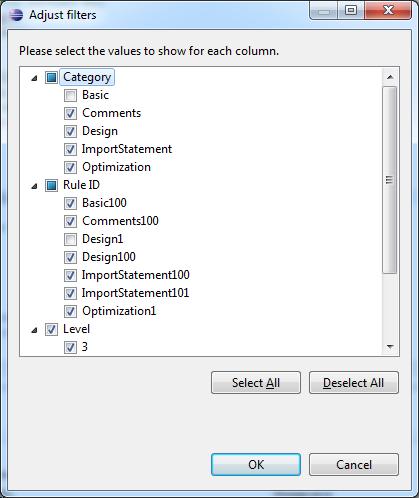
The Adjust filtersdialog.Adjust filtersdialog, a user can select the values for which violations should still be shown. The filters for all columns are combined. So when applying the filters shown above, violations will be hidden if they either belong to theBasiccategory or belong to ruleDesign1. Deselecting all values in a column has no sensible meaning; it will hide all violations regardless of the values in other columns!
