Visual Studio Code Plugin
This section describes how to install TICS Visual Studio Code Plugin. This plugin is compatible with Visual Studio Code versions 1.20.1 and up.
Installation
There are two ways to install the Visual Studio Code plugin: manually or through the TICS Installer.
For Linux machines, please look below in the Manual Installation section.
TICS Installer
For Windows installations, follow the following steps.
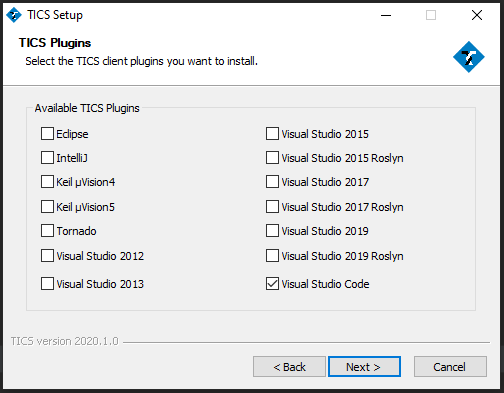
Close Visual Studio Code, run the TICS installer and select Single Server or Multi Server->TICS client
When getting to the TICS Add-ins dialog, select Visual Studio Code from the checkbox list.
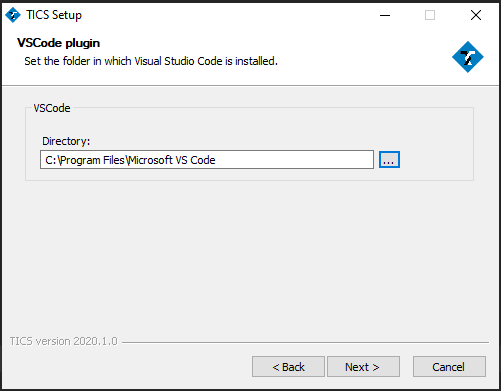
In the next step select the folder where Visual Studio Code installed, e.g C:\Program Files\Microsoft VS Code.
Complete the installation.
Manual Installation
In order to install the TICS Visual Studio Code plugin manually, you need to download a .vsix
distribution of the plugin from
TIOBE Portal.
This installation option also works for Linux machines.
To start Visual Studio Code from terminal for a given project, you can navigate to the project folder and run
vscode . or code .
This is due to an issue with Microsoft Visual Studio Code. The plugin needs access to your TICS environment variable.
Visual studio code currently does not read environment variables properly if started from the desktop icon.
For more information regarding this issue please refer to these issue reports.
here and
here.
Follow these steps to add this plugin to your Visual Studio Code environment.
-
Start Visual Studio Code.
-
From the
Extensionsmenu, select theInstall from VSIX...option.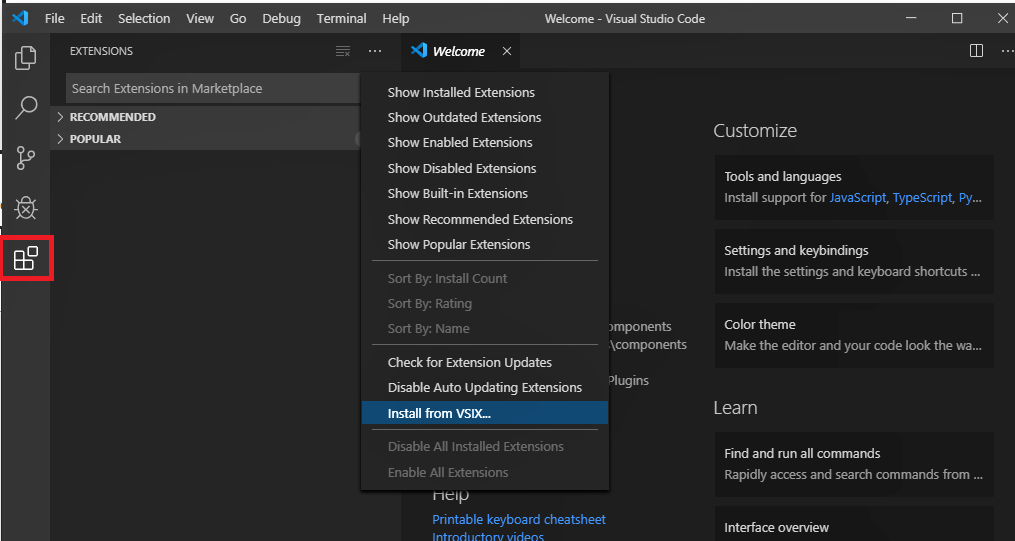
-
Select the downloaded plugin file in the
Install from VSIXfile selection dialog and clickInstall.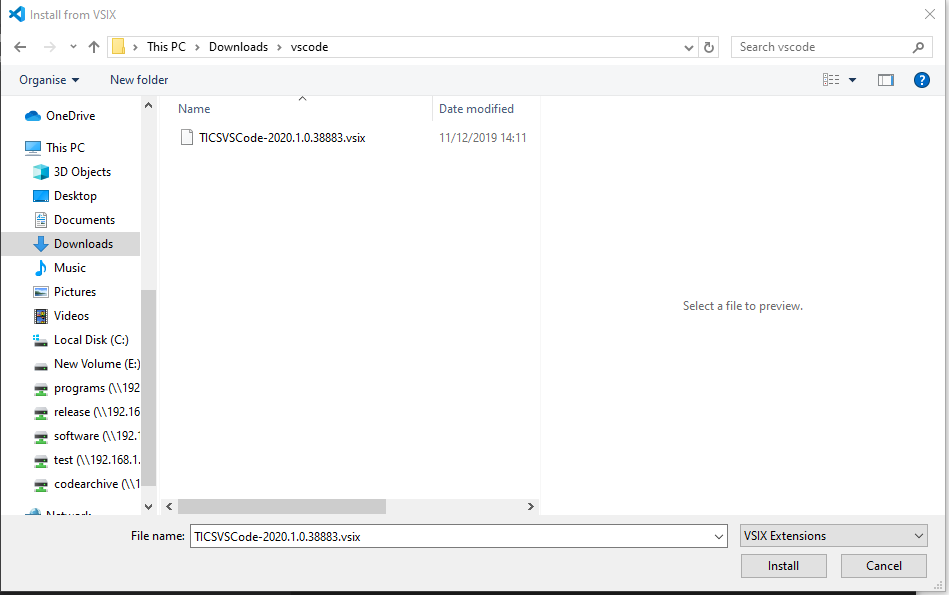
-
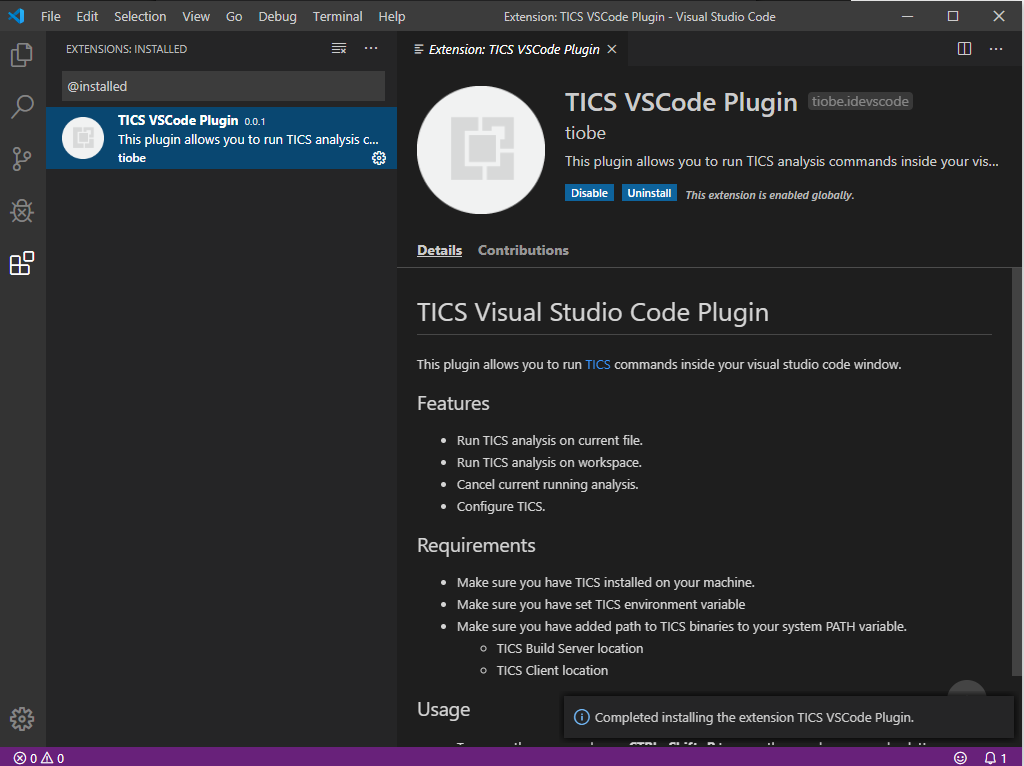
If successfully installed you should see the TICS VSCode Plugin extension page. You can now use TICS Visual Studio Code Plugin!
Usage
The TICS commands are available from
-
Editor Window
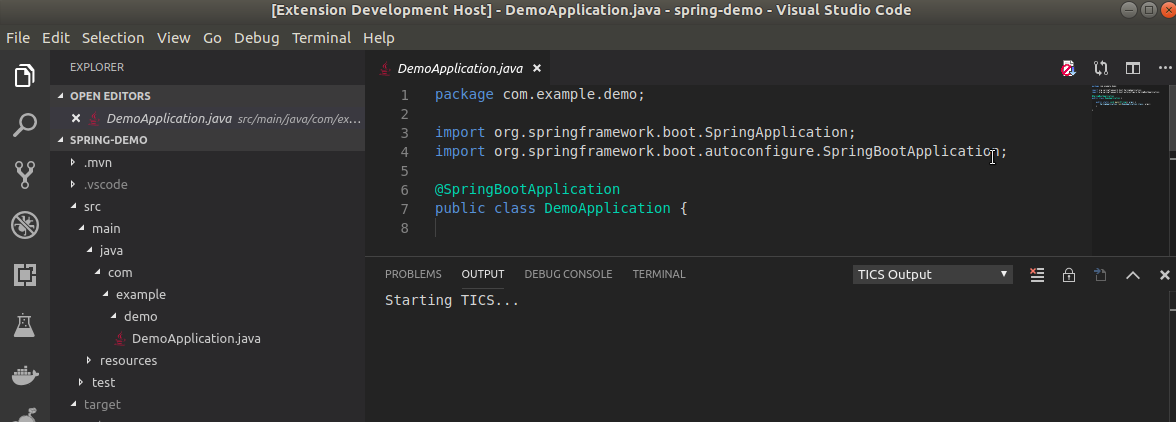
The TICS buttons will be visible in the Editor window once you open a file in the Editor.

The Cancel Analysis button will be visible only if TICS Analysis is active.
-
The Command Palette
To access the commands from the command palette, use
CTRL+Shift+Pto open the Visual Studio Code command palette. Start typing "TICS" in the command palette box. You will see all available commands in the suggestion list.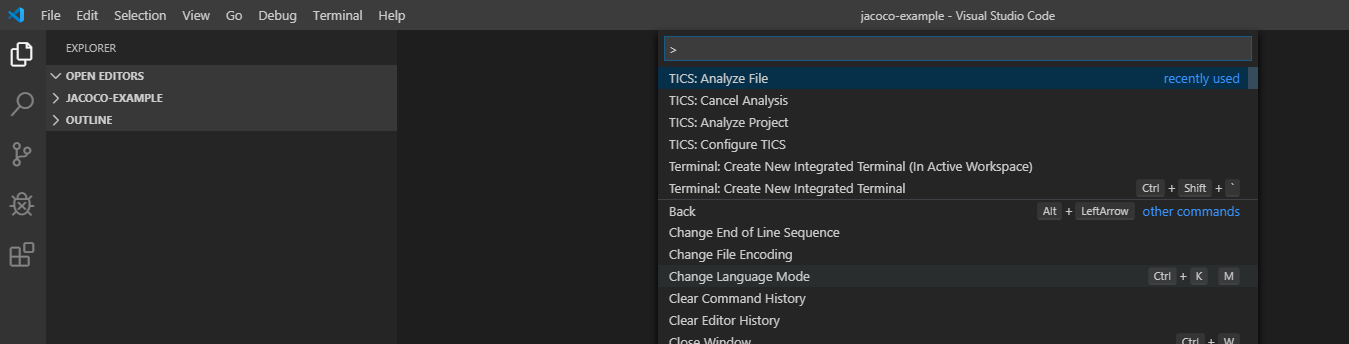
-
The Explorer Context Menu
To analyze a subfolder, right click on a folder and select "Analyze Folder"
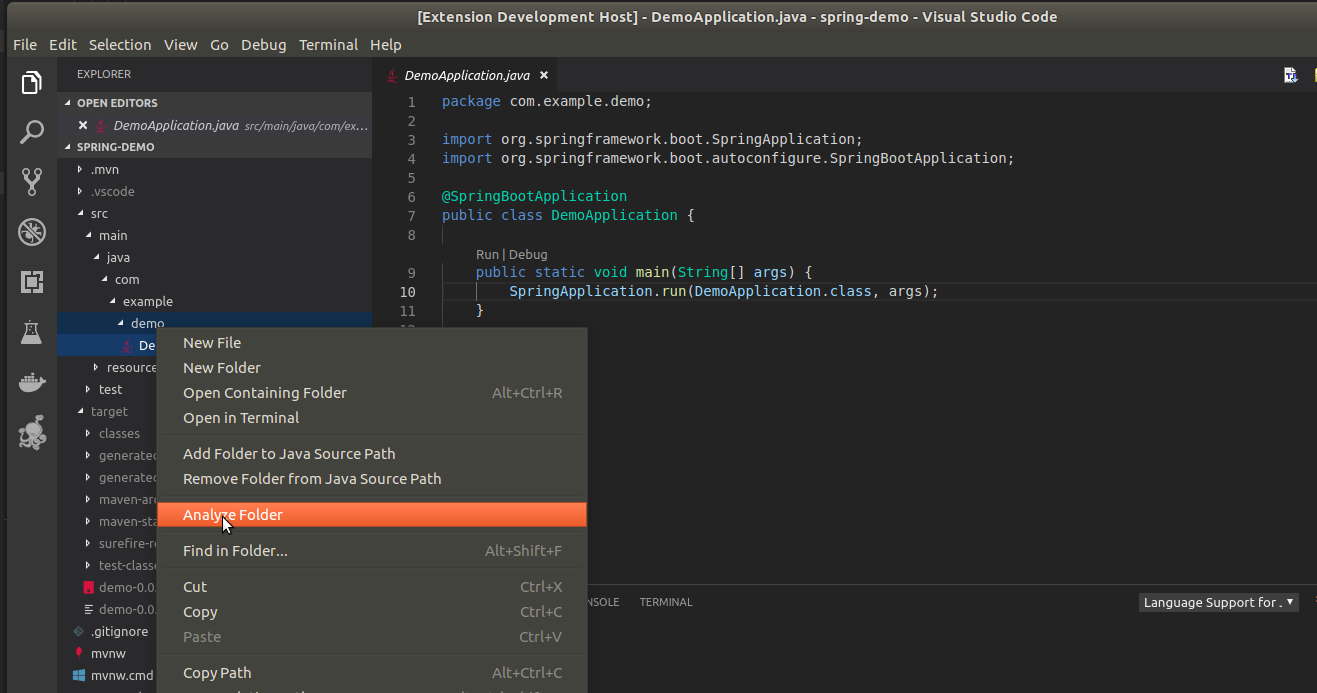
To analyze a file from the explorer context menu, right click on a file and select "Analyze File"

The TICS buttons have the following meaning:
-
TICS: Analyze File: This command starts the TICS analysis. It results in an overview of the violations of the available coding standards.
-
TICS: Analyze Project: This command starts analyzing all files in the currently opened project.
-
TICS: Cancel Analysis: This command cancels the TICS run.
-
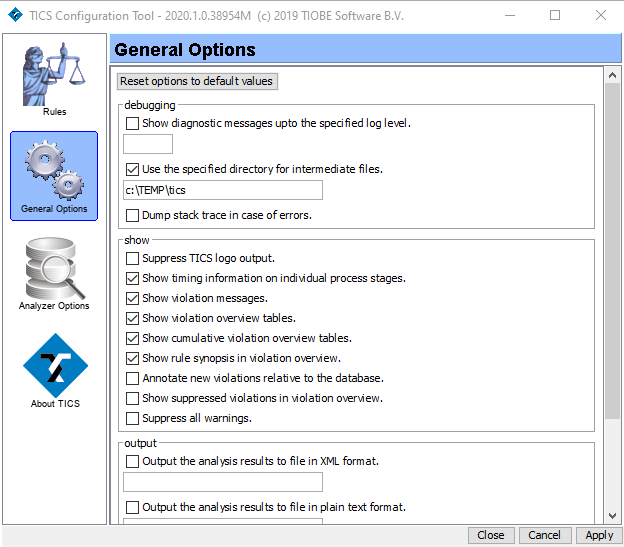
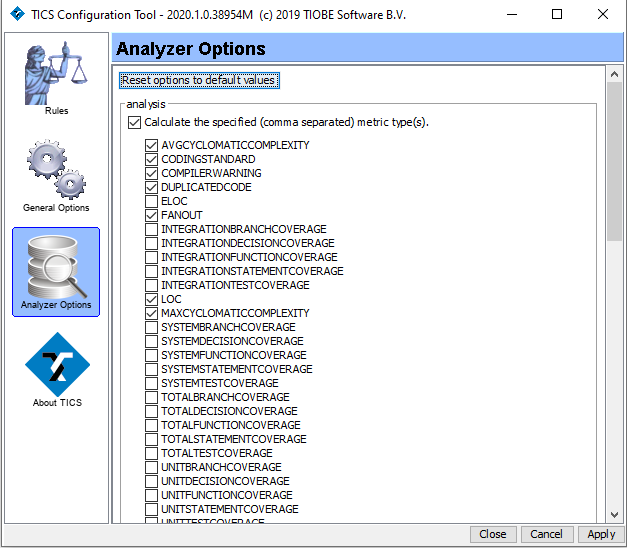
TICS: Configure TICS: This command opens the TICS Configuration Tool. This tool can be used to configure the behaviour of the TICS Client.
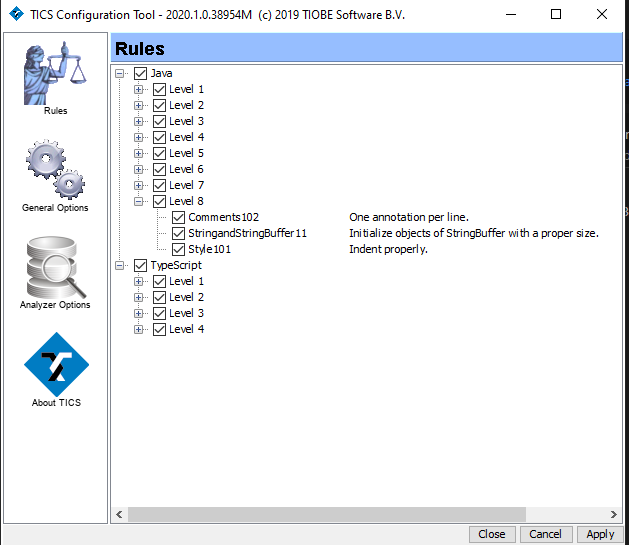
The rules are categorized by language and by level. Rules can be switched on and off per level or individually. If a rule has been switched off it is not shown anymore in the output window of Visual Studio Code. Note that hidden violations are still detected and being used for statistical overviews. You can right-click on a rule for its documentation. The settings specified by the user are saved in the HIDDEN.txt file.