Configuring Fortify
It is possible to incorporate Fortify results in the TICS output
for files.
Prerequisites
For a successful Fortify integration, the following prerequisites
must be met:
- The results must be available in the Fortify Software Security Center. TICS only retrieves the results and does not perform the analysis.
- The Fortify properties have to be configured correctly, see below.
Basic configuration
All Fortify properties can be specified globally in SERVER.txt or on a project-specific level in PROJECTS.txt. If the properties are declared in SERVER.txt as well as PROJECTS.txt, the project-specific properties will overwrite the global properties.
Syntax
The following properties have to be declared either on SERVER or PROJECT level:
'TOOLS' => {
  'Fortify' => {
    'SERVER' => 'URL to the Fortify Software Security Center, e.g.: https://fortify.mycompany.com/ssc',
    'TOKEN' => 'Authentication token for the Fortify Software Security Center API',
    ['TIMEOUT' => The time an API call may take (in seconds) before it is aborted],
    'PROJECT' => 'Project name in Fortify',
    ['VERSION' => 'Project version name in Fortify'],
  }
}
Note that the VERSION property is optional. When no version is
specified, the version with the most recent metric evaluation date for
which analysis results are available will be used.
Obtaining an authentication token
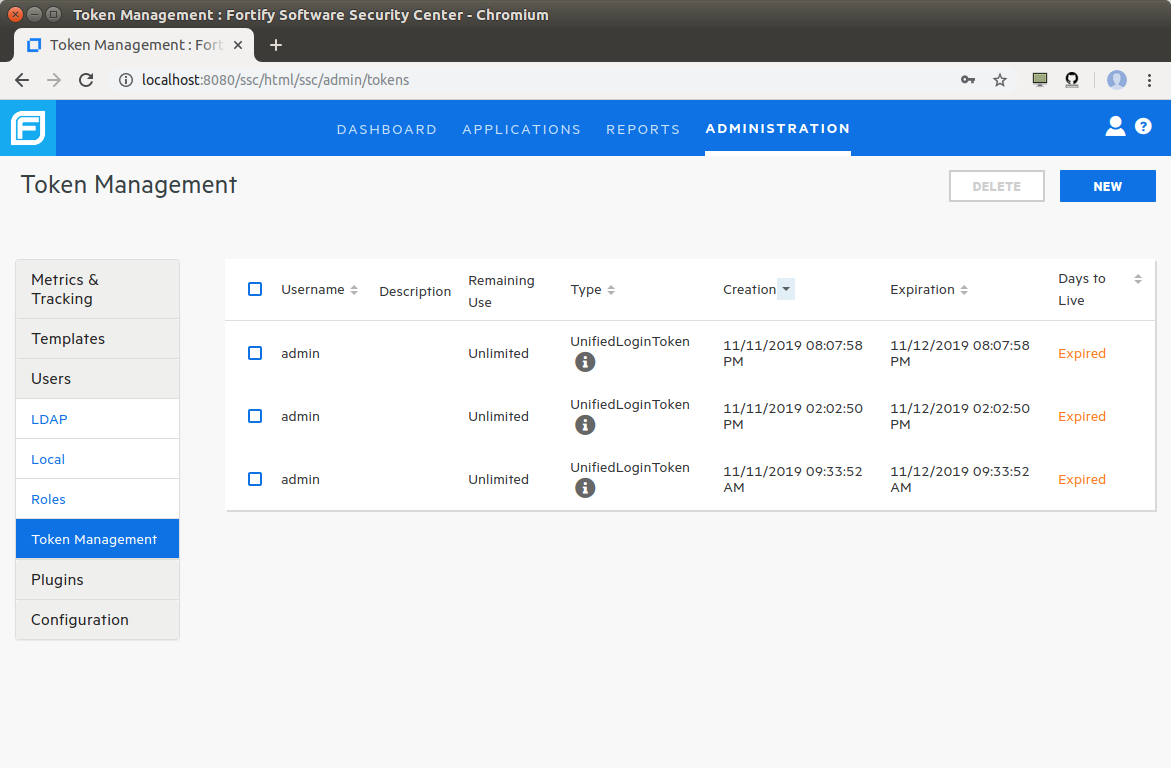
In order to access the Fortify API, TICS needs an authentication token. These
tokens can be generated via the Fortify Security Center web interface on the
Token Management page under the Users section from
the Administration pages.
The Token Managementpage in the Fortify Security Center.
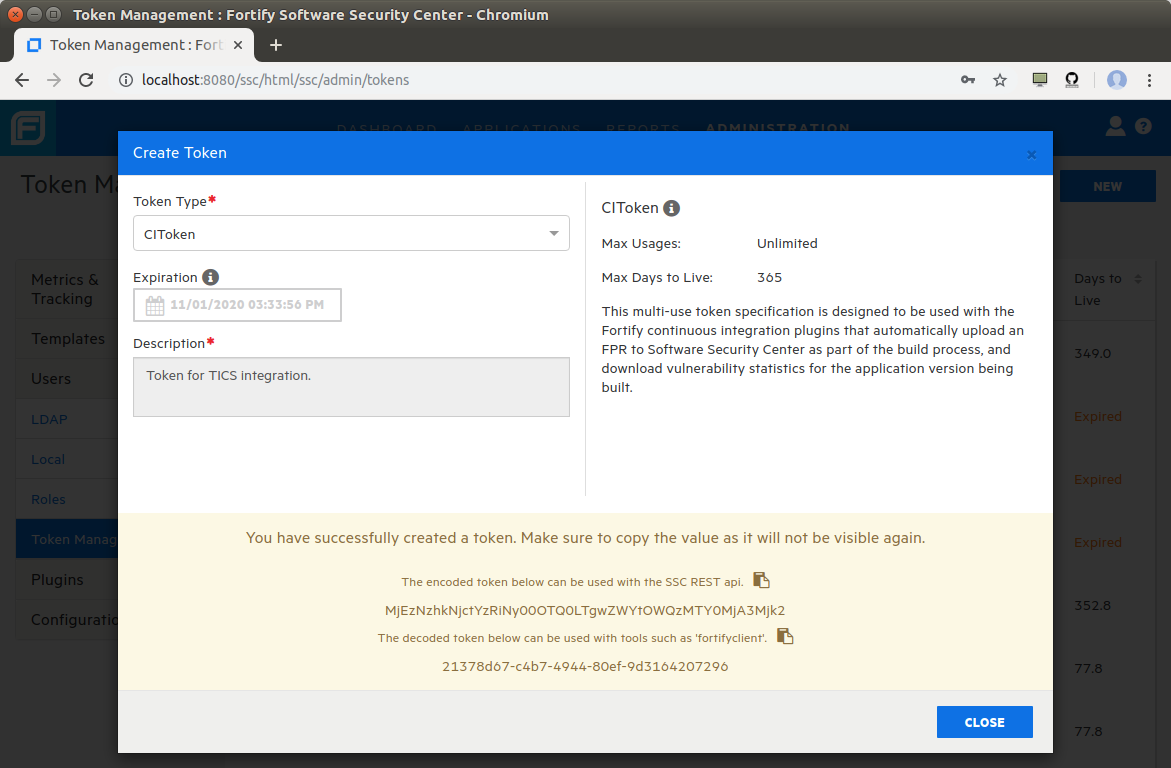
Clicking the NEW button in the top-right corner allows one to
generate a new token. This should ideally be a UnifiedLoginToken.
Alternatively, a CIToken can be used.
The New Tokenpage in the Fortify Security Center.
For usage with TICS, be sure to use the encoded token!

